Starting tomatoes from seed proves successful

img_4894

I don’t know about you, but I have tomatoes everywhere right now. My vegetable baskets are filled with them, they are on the kitchen counters and more are ripening by the day (at least they would if the sun would ever come back out here).

This is a good situation to be in though because last year my tomato plants lagged on producing tomatoes so our pantry was getting a little low on pasta sauce and other tomato-based items. It should be fully stocked after this year though.

I grow primarily Roma tomatoes for canning, with a few cherry tomatoes and one slicing tomato plant.

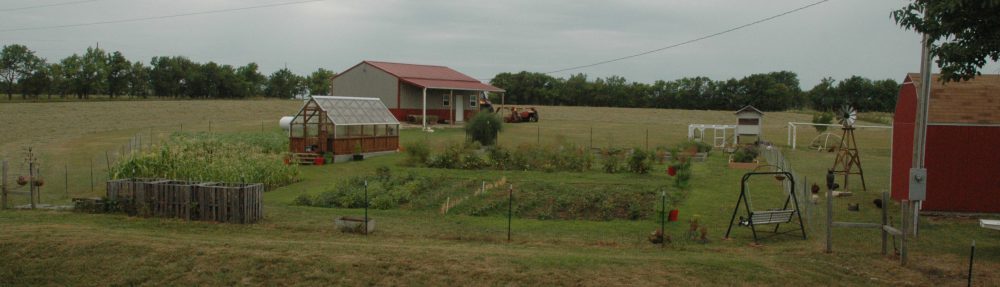
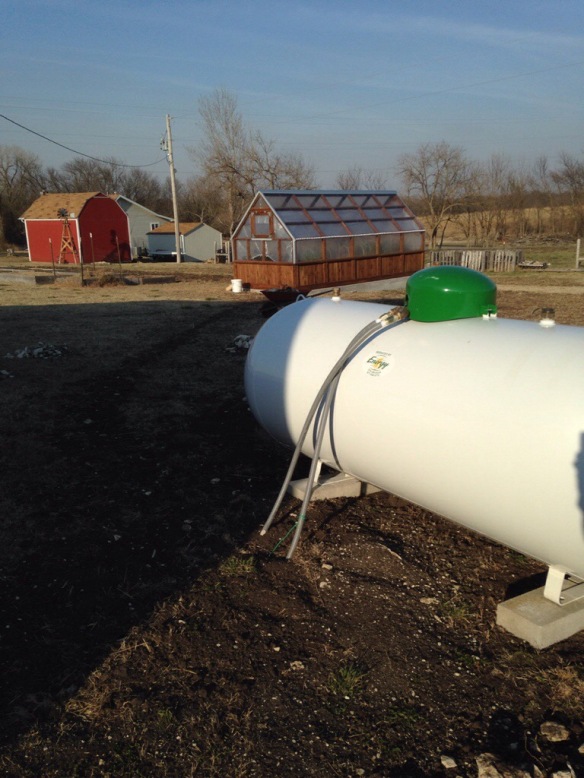
Last winter, I wrote about a new experiment I was trying with my greenhouse and starting all of my tomatoes from seed. I was thinking about that blog just the other day and realized I hadn’t followed up on it yet.img_4893

When I first put the tomatoes out, I was a little concerned because I had transplanted them into the largest pots I had for them, but they were still getting very root bound. The temperatures just weren’t warm enough yet for me to be comfortable putting them outside. So instead, I gave them the best care I could in the greenhouse but the leaves were starting to wilt just a little.

Finally, it was time to plant them. I kept my fingers crossed that they would all bounce back. After a few weeks in the ground, they did just that. All of my plants except the one that something ate and I had to replace, really took off once their roots had room to spread out. They grew into nice sized plants and they are producing more tomatoes than I think I have ever had, while many people in the area are having smaller amounts of tomatoes this year.

I know that I will be starting my tomatoes from seed again next year – but maybe a couple of weeks later in the year. I want to see if I have the same results two years in a row. If so, I will always be starting my plants from seeds from now on.

With all of these tomatoes, it’s time to start preserving them. I’ll begin sharing recipes and things I have discovered in my upcoming blogs.

Until next time, happy garden-fresh eating!

Julie Clements is a Butler County Master Gardener.
Share your ideas for garden-fresh recipes or ways to preserve at julieclements75@gmail.com and some will be featured in upcoming columns.


Enjoying a new twist on hamburgers

IMG_4594

With the garden well underway, it’s time to start enjoying those bountiful harvests. One thing I have lots of right now are herbs. I’ve really enjoyed adding some extra flavor to our meals with a wide variety of herbs. I recently tried a new twist on a summer favorite — hamburgers.

I usually just make cheeseburgers and have tried adding dill one time. This time, I decided to go all out. What could it hurt? If it wasn’t any good, we’d be making them again sometime soon anyway.IMG_4598

But not only were they good, they turned out delicious. I added a variety of herbs, giving it a unique and tasty flavor. With a little cheese on top, this was way more than your normal cheeseburger. I am hooked. I may never make plain hamburgers again.

My hamburgers included Oregano, Parsley, Basil, Thyme and more. (See recipe below) What combination of herbs are you going to try?

One tip I have read is after making the patty, use your thumb to make an indention in the middle of it. This keeps the burger from swelling up in the middle. It seems to work. Also, spray the hamburger with vegetable or canola oil to keep it from sticking to the grill.

To top off this creation, lightly butter your hamburger buns, then place them on the grill for a couple of minutes. Build your hamburger with your favorite toppings – two of mine are homemade ketchup and home canned pickles.

Until next time, happy garden- fresh eating!


Herb Hamburgers

1 lb. hamburger

1 1/2 tsp. fresh thymeIMG_4586

1 T. fresh garlic chives

1 tsp. fresh greek oregano

1 tsp. fresh sage

1 tsp. Worcestershire sauce

1 tsp. salt

2 tsp. ketchup

1 egg, lightly beaten

Mix all ingredients and form into patties. Spray lightly with vegetable or canola oil, then grill. Enjoy topped with cheese and your favorite toppings. For the buns, butter one side and place on grill for a couple of minutes, until lightly browned.

Getting the garden planted

Do you have your garden in yet? I got part of mine in right before the recent rains for once. Usually the day I’m able to plant happens to be right after a big rain, so this year it worked out perfectly.

With the 10-day forecast showing lows staying near 50 degrees or above, it was time for those warm season vegetables. One evening after work, I got all of my tomato plants in the ground – 16 in all. It may soimg_4217-copyund like a lot, in fact it’s more than I have ever planted, but I am running low on all of my tomato-based canned foods, such as ketchup, salsa, canned tomatoes, tomato sauce, pasta sauce…Well you can see why I need so many plants. Let’s hope I can keep up with all of the canning when they start really producing.

In addition to tomatoes, I also got my pepper plants in the next evening, as well as my dill. Do you do companion planting? I try to do a little, and one of the good matches is supposed to be peppers and dill, so I planted my dill plants in between the rows of peppers. It’s supposed to repel some of the bad insects and attract some of the good ones. 

My pepper patch keeps expanding each year. I want to try some new varieties each year, but I also have to have some of my favorites, which are most of them. Therefore, I ended up with quite a few peppers this year, but that’s OK. After eating some and freezing some for the winter, my husband will smoke a bunch of peppers, which I will then dry and crush to make a variety of homemade rubs and seasonings. It’s fun to try all of the different combinations; just keep notes of what you do so you know what you like and what you don’t.

After all of this rain, I can’t wait for the sun to come out and watch the plants shoot up. They always love the rain water.

Now it just has to stop raining long enough for me to get my beans (dry and green beans), corn, okra and melons in the ground. I’m excited to see what my expanded garden produces this year.

Resist those urges

Spring garden season in Kansas is always interesting. The weather usually warms in April, so it seems safe to plant those warm season crops. If you’re like me, you’ve had them for a few weeks already and can’t wait to get them in the group. But DON’T DO IT!

I was looking back at my gardening calendar from laimg_5799
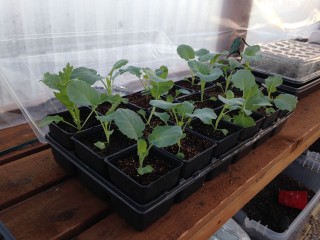
st year and saw that I did plant tomatoes about this time. Yes, even I have trouble taking my own advice. The problem in Kansas is you never know what the weather is going to do. After planting on April 25 last year, we then had a frost about a week later. Every good gardener knows tomatoes and frost do not go together. 

This year, thanks to my new greenhouse, I have been able to be a little more patient. My goal is the second week of May to plant, but we’ll see how that goes. It is a good thing I didn’t plant as early as last year though because the temps dropped today and the low to nights this week has been 39 degrees, which also brought with it frost. (Then back up to a low of 53 degrees in two days; it’s crazy around here this time of year.) While 39 degrees is not freezing, it is getting dangerously cold, and out in the country where we are it always seems to get a few degrees colder than the forecast. All of that concrete in towns always keeps it a bit warmer. 

So keep your fragile seedlings in a warm place and try to resist those urges. You will see the rewards in the end for your patience – jars and jars of tomatoes, ketchup, pizza sauce and more.

The discovery of Dandelion Syrup

Syrup

Dandelions, dandelions and more dandelions. They seem like they are everywhere in the spring. Last time I talked about making Dandelion Jelly, but I wanted to do more. I started exploring the uses of dandelions and there are many, but one in particular jumped out for me.

Dandelion syrup – it sounded good and seemed fairly easy to make, although a longer process than with the jelly.

Once again I set out to pick some of those yellow blossoms. Just one note of caution: Watch out for the bees. There were a lot out this time, so I just let them keep their dandelions and picked the ones that were free of bees. We all were happy that way.

Once I had about 150 dandelions, I headed back in to begin the process. First rinse the flowers and let them dry for a while. Then again pluck the petals from the green leaves. Unfortunately, there doesn’t seem to be any way to get around this process if you are going to be eating the end product. With the petals plucked and in a bowl, bring four cups of water to a boil and pour it over the petals, making sure they are all immersed in the water. Cover the bowl and leave it on the counter as it cools to room temperature, then put it in the refrigerator overnight.

The next day, strain the petals from the water and discard the petals. In a large pan, mix the petals and 3 cups of sugar and 1/4 cup of lemon juice. Simmer this about one hour 25 minutes. It has a wonderful rich flavor, with a definite hint of honey.

It’s best to store the syrup in a glass jar, but other containers will work as long as they are not metal. Cover and keep in the refrigerator. This was great poured over some buttermilk pancakes. (I warmed a portion of the syrup in the microwave before using it. I wasn’t sure what reheating over and over would do to the syrup, so I didn’t heat the entire bottle.) It also would be good drizzled over some warm biscuits right out of the oven. One other use I found is for a sandwich. Growing up I never liked peanut butter and jelly, so my mom made me peanut butter and syrup sandwiches. I know it sounds strange, but it tastes really good. I recently purchased a bowl of freshly made peanut butter from the store and decided to try it. I mixed about a third cup of peanut butter and 2-3 tablespoons of syrup together and spread that on some homemade bread. It was delicious! I can’t wait to have another sandwich.

Now as I enjoy my dandelion jelly and syrup, it’s time to try something easier – a recipe for dandelion and rose soap. At least this time you don’t have to pick out the yellow petals, so it should be a piece of cake.

Until next time, happy garden fresh eating!

Julie Clements is a Butler County Master Gardener. Send your comments to her at julieclements75@gmail.com.

Enjoying the taste of dandelions 


While many people fight an ongoing battle to remove dandelions from their yard, I have always viewed them as a sign of spring. They are some of the first hints of color after a long, cold winter.

But they are more than just something to look at. Knowing they were edible, I set out to find ways to use dandelions, besides the soap I had made from them last year.

Dandelion Jelly sounded good and looked good from the information I found about it online.

So I set out to gather my dandelions. After a couple of times of picking, I soon realized the best time to pick is late morning. The dandelions are fully open and easy to spot at this time. This year, my yard has been covered with the bright yellow flowers, making picking fairly easy. For one batch of jelly, you will need to collect four cups of tightly packed dandelion heads. Then rinse them and let them dry for a bit. This will make the next step a lot easier.

You have to remove the yellow petals from the green leaves surrounding them. Some have said they use a knife and cut off the bottom of the dandelion, then remove the petals, but I found simply grasping the bottom of the flower in one hand and then plucking the yellow petals from the middle works pretty well. Sometimes you have to go back and pick a few of the leaves out if you got several, but a few doesn’t seem to make a difference. (I read that too many green leaves will make the jelly bitter.) You will have sticky, yellow fingers at the end of this process, but it’s worth the effort.

Once all of the petals are “plucked,” place them in a jar or bowl and pour four cups of boiling water over them. Place a lid or saucer across the bowl or jar to keep in the steam. Let this set for a minimum of two hours or even overnight, letting the petals steep.

After this is done, strain the liquid into a pan, removing all of the petals. Add one box of pectin and one quarter cup of lemon juice. Heat the mixture to boiling, then add three cups of sugar. Stir constantly and boil for one minute. Then pour the jelly into sterilized jars and process for five minutes in a water bath.

The jelly looks a bit like the Sunflower Jelly I made last summer, only a little darker and with a much richer and different taste. There is a hint of honey flavor in the jelly.

Until next time, happy garden-fresh eating!

Julie Clements is a Butler County Master Gardener. 

Keeping the greenhouse warm even on cold nights

20170317-215457-78897553.jpgSpring in Kansas can create a challenge for getting an early start on plants. Once the weather begins to warm up, the urge to start planting just can’t be denied. But unfortunately, just because there is a couple of weeks of warm weather, does not mean winter is over. The temperatures always drop below freezing at least one or two more times. Even in the green house, that is too cold for tender seedlings to survive.

So I set out on a mission to learn how to heat the greenhouse. I didn’t want to keep it hot, just above freezing. My goal was to keep it at at least 40 degrees over night, even when the lows dropped into the 20s.20170317-215458-78898396.jpg

I researched a number of heaters and finally settled on a heater that ran off of propane that seemed like it would heat the area. While it provided quite a bit of heat, it ran off of small propane tanks or grill-sized tanks. Those only lasted about two nights, so that was very economical or feasible.

After a visit to a friend’s greenhouse, I learned he used a blue flame heater, which was hooked up to a larger propane tank. With that, I knew I had to think bigger than just a portable heater. I decided to have a propane tank installed and a line run to the greenhouse. I have a small, wall-mounted blue flame heater that works well to keep the greenhouse warm when the temperatures are in the 30s. It usually stayed about 10 degrees warmer than it was outside.

When it recently dropped into the 20s, I did supplement it with a couple of electric space heaters, which kept it in the 40s. Another thing that helps is to put a fan in front of the heater to help circulate the warm air. Now my seedlings have a warm place to continue growing until they can go out into the garden.

Almost time to start planting potatoes

img_1796-2It’s almost time for that first planting of the season. I know I’m excited to get out and dig in my garden.

Potatoes are traditionally planted on St. Patrick’s Day, a date that I try to keep close to and seems to work.

I’ve tried red potatoes and yukon gold over the years. I’ve always had much better luck with red, getting as much as three times more red potatoes as yellow. I still like the Yukon Gold, so I plant a few, but I use most of my space for a couple of varieties of red potato, although I can’t really tell the difference in taste or quantity of the different ones.

Another thing I’ve found beneficial is to plant the potatoes in a raised bed. That makes it easier to mound the dirt up around them as they grow and also provides looser soil for growing. I have gotten a bigger harvest since I moved my potatoes to one of my raised beds.

If you’re like me, you can’t get too many potatoes. While you can freeze and dehydrate some, they store pretty well in a cool, dark place. I keep mine in a wooden box that has slats on the side so they get some air circulation. I had some from last year still in a box this winter. They had started sprouting, but it wasn’t a waste. I planted them in my greenhouse and they are now growing. Hopefully they produce a lot of potatoes.

With an unlimited supply of potatoes, at least for a while, there are a large number of things you can do with them.

I enjoy making homemade potato chips. I found a microwave dish once for cooking them and it works great. The benefit is you can season them however you want, such as simply with salt, or with some dried herbs or seasonings. You can get creative.

Another option is baked French fries; to do this just toss with olive oil and seasoning then bake at 450 degrees for 20 minutes, turning half way through.

Of course, you can mash them or bake them as well.

I also love to make  homemade potato soup.

There are so many ways to enjoy potatoes. What’s your favorite one?

Until next time, happy garden-fresh eating!

Homemade Potato Soup
6 large potatoes
5 cups chicken broth
3 T. butter
Parsley
1 cup milk
salt and pepper
olive oil
1 onion
1 tsp. garlic powder

Chop potatoes, drizzle with olive oil and bake for 20 minutes at 425 degrees. Chop onion and cook in olive oil until soft. Add broth, garlic powder, salt and peper. Add buttler then potatoes and parsley. Bring to boil, then simmer 20 minutes. Stir in milk and serve
Julie Clements is a Butler County Master Gardener.
Share your ideas for garden-fresh recipes or ways to preserve at julieclements75@gmail.com and some will be featured in upcoming columns.

It’s time to start getting those seeds planted

img_5799

It’s an exciting time of year – garden season continues to get closer and there are finally things to start planting in preparation.

It’s about time to start some seeds if you are planning to start your own, rather than purchase plants – although both methods have their benefits.

For the first time this year, I’m trying to start some of my Roma tomato plants from img_5800
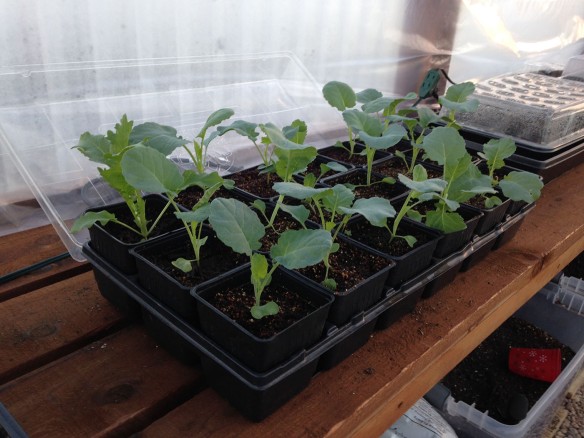
seed.Usually I just buy the small plants during some of the early sales in the season.
I planted my seeds last week and already have a couple of tiny sprouts showing. I hope by starting them from seed, I can replant them in some larger pots, then have some pretty good size tomato plants when it is time for them to go into the garden.

I’m also going to buy some plants like I usually do. It should be interesting to compare how much each produces.

Another seed you should have going by now is celery. It takes a long time to grow, so start it indoors. I usually try to start mine early in January, but it’s not too late to get it going. They will still have time to be transplanted outside and produce fresh celery all summer and fall.

img_5798On a side note, I’m hopeful to have some fresh salads soon from the lettuce that I started in my greenhouse. With the help of a little heat at night to keep the temps up, it is flourishing. If you don’t have a greenhouse, you could start a small pot of lettuce on your windowsill in a south-facing window. The seeds sprout in no time, then once the leaves are large enough to eat, start harvesting what you need for each meal and it will keep growing back.

Until next time, happy garden-fresh eating!

Julie Clements is a Butler County Master Gardener.
Share your ideas for garden-fresh recipes or ways to preserve at julieclements75@gmail.com and some will be featured in upcoming columns.

Start preparing your garden for spring now

img_5768

With the arrival of seed catalogues on a regular basis and the warm weather we have had recently, gardening is becoming a priority for me again.

An important aspect to a successful garden is to properly prepare the soil for the upcoming year.

For those of you like me, who didn’t get compost added to the garden last fall before it got cold, there is still time to get this chore done. The recent warm weather has provided the perfect time to do a little work outdoors.

According to a column by Butler County Extension Agent Larry Crouse, winter can be a good time to add organic materials – although fall also is an excellent time – as long as the soil isn’t frozen. It also stated that working soil when it is wet destroys the soil structure and results in hard clods that are slow to break down. But also, if it is too dry, the soil may need watered so it is more easily tilled.img_4217-copy

Although there hasn’t been a lot of rain, we didn’t find the soil too dry to till.

After tilling up a couple new garden plots – I never seem to have enough room – I wanted to start preparing the soil in those plots as well as my current raised beds. I do have a compost bin at home and got several buckets of compost out of it this winter already, but it still isn’t enough. An economical option is to visit your local compost site. El Dorado has such a site, where residents can get free compost and mulch, all you have to do is load it yourself. Check your local communities to see if you have such a facility available.

I set off for the compost site Saturday with my husband in our truck. The only downside to this source of materials is things you don’t want such as rocks, larger pieces of wood and debris because of the Kansas wind can get mixed in. Most people don’t want those things in their garden soil, so I came up with a fairly easy way to filter that out. I created a two-foot square wood frame, then stapled on 1/2-inch wire screen. So far the easiest method I have found is to set a bucket in the truck bed, put the filter on top and then pour dirt on top. You can gently shake the tray or use a rake or your hands to move it around so the good stuff falls through, then get rid of what remains. As the bucket gets full dump it into the truck bed and continue. The benefit of doing this in the truck bed rather than on the ground is you don’t lose all of the compost that falls on the outside of the bucket.  It still takes some time and effort, but the end result is worth it. It also helps if you have two people: one to shovel and one to filter. You want enough to have a two-inch layer of compost.

I got one load this weekend, but still have some more to go before spring. Hopefully the weather holds out.

One other tip is it is good to get a soil test, which can be done by providing a soil sample to the Butler County Extension Office. This will tell you what you need to add to your soil to create the optimum growing environment. To learn more, visit http://www.butler.k-state.edu/horticulture/Soil%20Tests.html.

Until next time, happy garden-fresh eating!

Julie Clements is a Butler County Master Gardener.

Share your ideas for garden-fresh recipes or ways to preserve at julieclements75@gmail.com and some will be featured in upcoming columns.